skip to main |
skip to sidebar
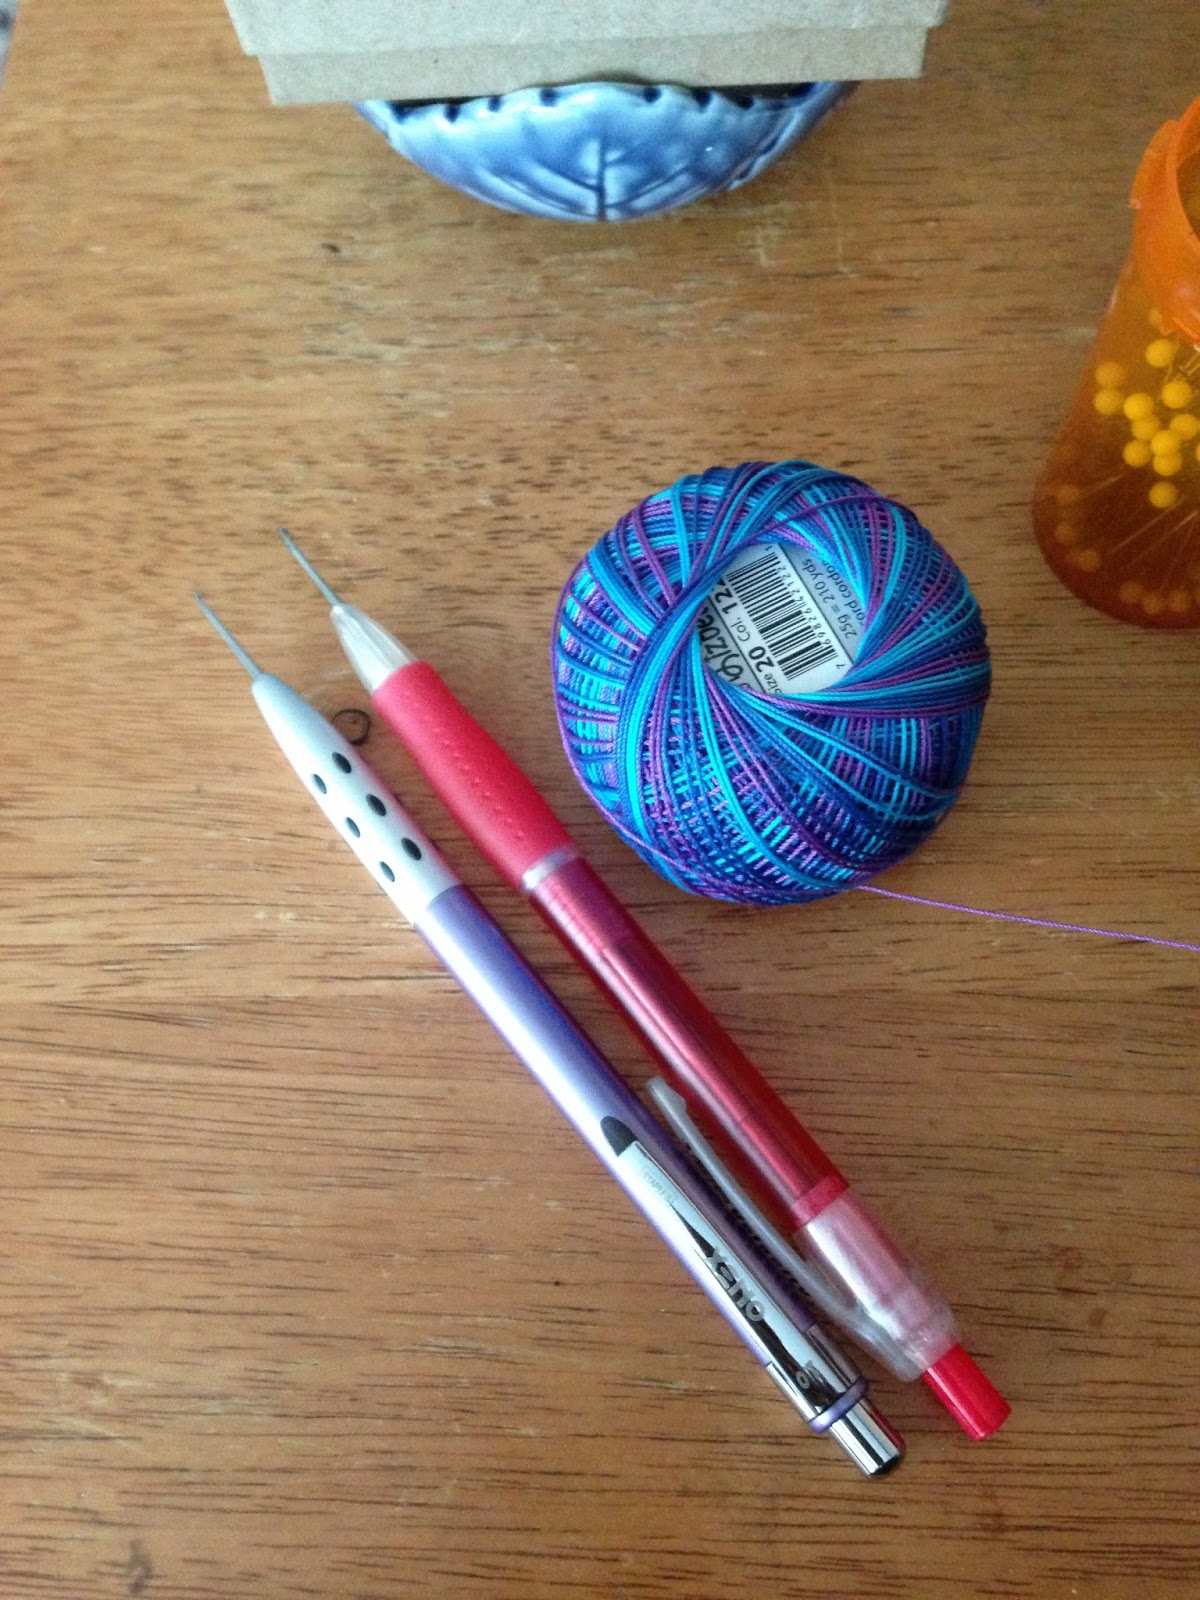
Those are not pens. Those are fine steel crochet hooks shown in the photo. This is my solution to the problem of losing small steel crochet hooks. I have a couple of these floating around. I've had them for years and have no idea how I acquired them. None. Most likely, I got the hooks in a collection of other knitting needles and crochet hooks that I have acquired. Some were given to me and I once or twice bought assortments of tools on eBay.
Generally, I don't do much crochet. I certainly haven't done any crochet with fine cotton in many years. These hooks have been languishing in drawers or pencil cups. Until I learned how to tat.
Tatted motifs are joined by drawing a thread through a tiny loop called a picot. A small steel crochet hook is the BEST tool to perform this function. Yes, you can use the pointed "pick" end of some tatting shuttles for this purpose. You can also go bats**t insane in the process. (It works for larger thread/larger picots.)
Small steel crochet hooks, in their naked state, tend to get lost. I drop them. The cat helps me drop them. If I put them in a bag, plastic or fabric, they tend to poke right through the material. Irritating.
It is perfectly possible to buy crochet hooks with large, "ergonomic" handle and neat little caps. You will also pay a fortune for those hooks. A barenaked set of steel hooks costs about $7.00-$14.00, depending on the number of hooks. The same set of steel hooks in plastic handles, suddenly costs $60.00. Not happening. My current solution is to ransack the ballpoint pen supply in my household, substituting steel hooks, for the ink cartridge. So far, I've found two or three casings that work with the hooks. Eventually, I might trim the hooks down to make them retractable. That's a future project. For now, I'm happy that the hooks have a nice handle, are easy to see and can be clipped to a pattern. They don't poke through bags nearly as much, now. One casing, not shown, uses the pen cap to cover the hook. I love inexpensive solutions.
This is my tatting set-up. At the moment I am just sick of knitting. That seems to happen every so often.
Last summer I finally, finally got serious and taught myself to tat for real. After a good nine months of neglect, I've picked it up and am making some progress. Of course, we're talking about...expensive progress. I just had to buy few more tatting books. Worth it.
I've finally discovered the world of modern tatting patterns. The newer sensibilities are much more to my taste. One reason I didn't put any effort into tatting before was that the designs were just dreary, and old patterns tend to be written out in long hand.
I like charted knitting patterns and the same is true for tatting patterns.
The photo shows one of my two tatting boxes. Both boxes are metal lunchboxes. One box, not shown, simply holds my balls of various cotton threads. The box in the photo, gets all the action. The storage compartment is filled with my tools, tatting shuttles, scissors, pins, tapestry needles, and small steel crochet hooks. I have fitted the lid of the lunchbox with a cork board, to use in arranging or blocking pieces.
At the moment, you can see a completed bookmark pinned out, made from a pattern by Tat-a-renda. I liked the look of just the first two rounds of the pattern, so I omitted the last round of the pattern.
My current sample, shown pinned at the lower left corner, i s trefoil edging. I'm making that to use up the thread left on the shuttle from the bookmark. Thread used is a size 20, Lizbeth Cotton cord. The cord is a variegated mix of pretty blues and violets that looks great until you actually use it in a project. Just as in knitting, variegated cords aren't suitable for all projects. The color distribution looks better in the trefoil edging than in the bookmark. Complicated pieces will be made in solid or tonal cords from now on.